31 Dec 2014

Chaos Warhound Project - Armour Panels

Happy Christmas and New Year peoples!

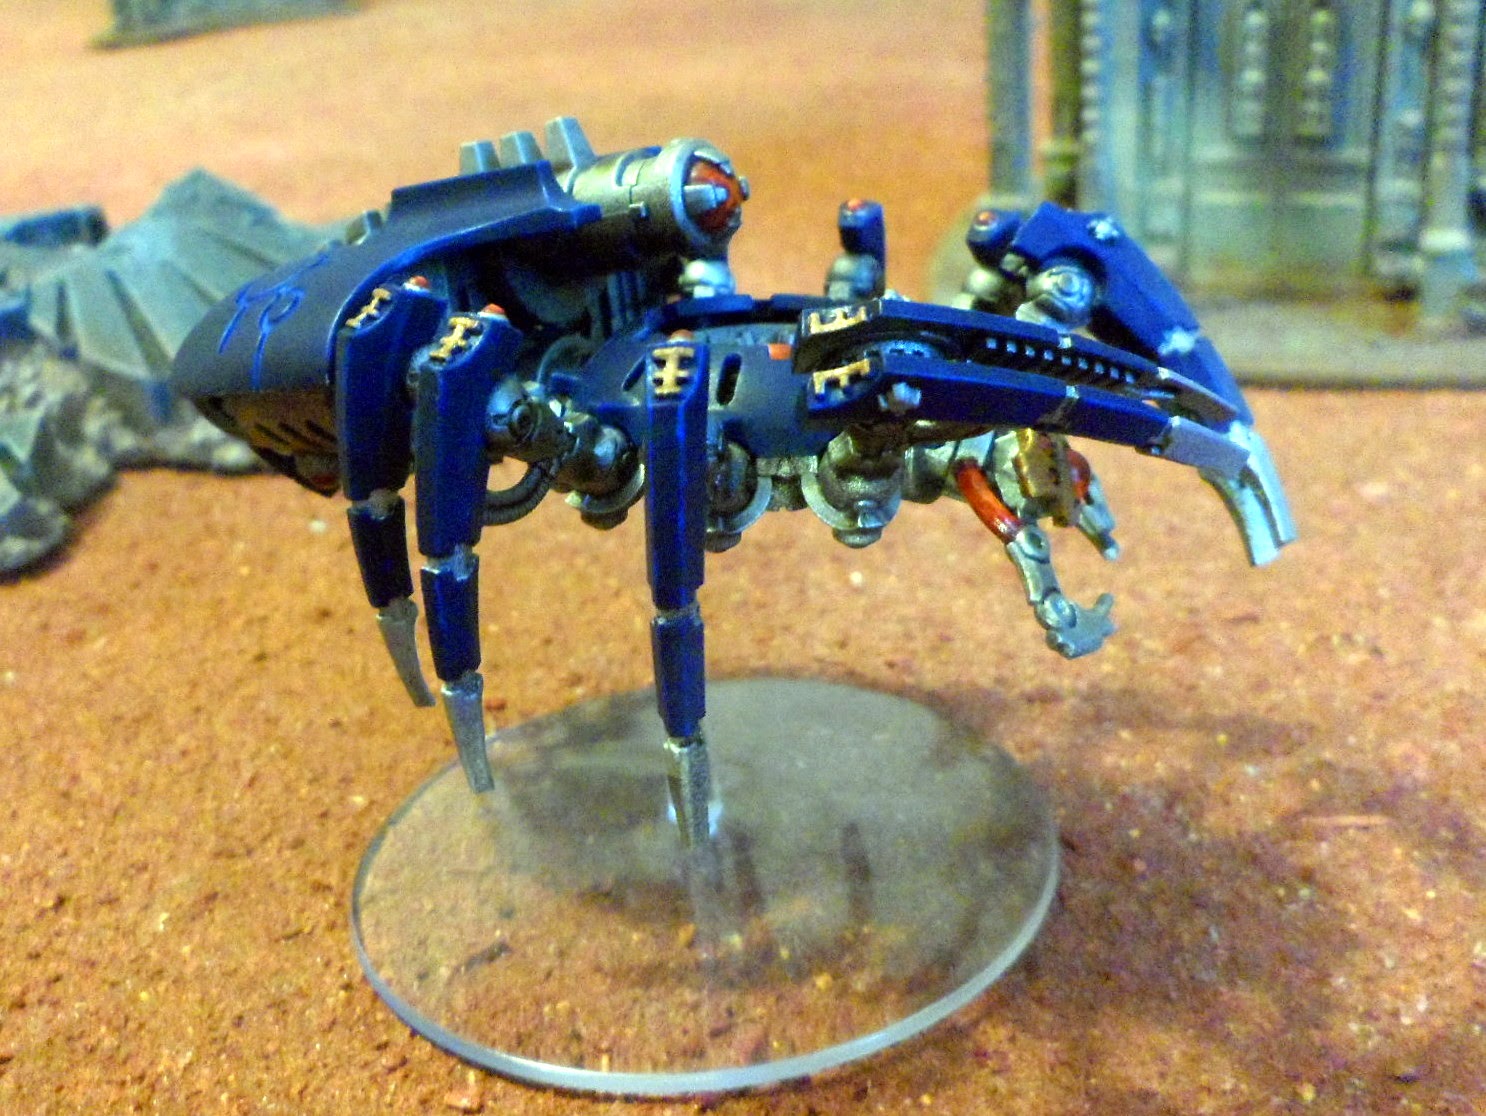
Its been a few weeks since I have posted, but there has been a took of progress made in that time. First up we have the completed Armour Panels for the legs and erm...crotch...areas.

These were relatively big steps in the build and paint for me for the following reasons:
  1. This is where we are starting to display Legion colours - so I needed to choose a Legion.
  2. I'm not using a airbrush - is it doable?
  3. How was I going to add detail to/break up blocks of solid colour?
Question 1 was a biggie...do I paint it up to be an Iron Warrior titan? I am sure it would look good, but didn't fit the fluff, so instead I looked at the different Traitor Titan Legions and where possible read their history and tried to get an idea of the colours. I can't remember the exact ones I considered off the top of my head, but there are less than half a dozen Traitor Legions with a decent amount of info and pictures and ultimately I settled on the classic Legio Mortis. Mainly because the sheer amount of reference info. Legio Mortis comes in two flavours; pre-Heresy is red and black with gold trim and post-Heresy is basically full-blown Nurgle. Obviously I've gone with a pre-Heresy theme. I've even come up with my own history for the Titan(s) which I will try and put up one day.

Onto question 2; the airbrush. I've never used an airbrush and luckily the Legio Mortis heraldry doesn't require much more than some stripes - so it should be doable.

The second leg Armour Panel required stripes, so I treated it just like I would with my Iron Warriors hazard stripes - get the first colour down and then draw on the lines by hand (masking tape wasn't possible because of the amount of raised detail underneath). Then its a case of filling in the lines and cleaning up the edges where I've slipped.

Question 3 ties into Question 2 - you'll notice that all of my Iron Warriors are battle-scarred, so I went the same direction with the Titan (which will also tie into the fluff in my head). The actual model is already pretty damaged (on purpose) so this really helped.

To add an extra touch, I added line highlights to accentuate the detail and break up any solid blacks.


Hope you like - next we are looking at the legs themselves.

29 Dec 2014

Bloated Bellies - Plaguebearers Squad Finished!

Hope you are having a good Crimbo period and your bellies are not as bloated as these guys, a squad of Plaguebearers for my Relictors to summon using Daemonology - fighting fire with fire, the true Relictor way! I spoke about it in a previous post Relictor Daemonology.
These have been finished off with some yucky Nurgle Rot paint for glistening slime ridden guts and wounds. Nice stuff!
Thanks for dropping in, have a good holiday period and hope Santa bought you lots of new Weemen!

24 Dec 2014

Happy Christmas From the team at Weemen!

 Hope you all have a fantastic Christmas, and a Happy New Year! 

Bring on the 40k Battlefields in 2015


16 Dec 2014

Imperial Knights - Questoris Knights - WIP

Hi One and All, thank you for looking.. sorry its taken a while to blog any of my progress- to busy ATM..

Just a quick post on my WIP Imperial Knights,

I have opted to create my own 'Knightly Order' with the background behind them being an order that had there initial home world destroyed, thus they have in essence became a 'freeblade' house. I will explain more behind them in a future post.

Below are the first 3 of my Knights, all almost complete- you might have seen them in previous battle reports..
 
I've gone for a metallic finish to the knights, with the 'green knight' acting as the leader of the 3. My plan for the house is that they will operate in packs of three, with the lead Knight having a green colour. The ion shields are to have transfers applied with the house symbol, 2 numbers relating to  the 'pack number' and squad number and a space for a personal heraldry. The Right pauldron will carry the Imperial eagle on it, with the Left and other armour plates carrying symbols of honour, awards etc.

I've also integrated LED lights into the heads of all 3, and will show them 'on' in my next post.

All three have had a scenic base built, with the view of all three walking through a destroyed building complex- with bodies of both Necron and Relictors of Siphs forces, as well as a random Ultramarine. Further knights will have the remains of 6th Iron Warriors on them..


Thanks for looking- and enjoy your time with the Weemen team!

15 Dec 2014

Necron Canoptek Spyder #2

Hello Dear Reader, thanks for dropping in.

Here is the latest creation the Necron Crypteks have made for the ever growing, ever-living Necron Army. Imotekh will be grateful, the previous Spyder never lasted long enough to get into combat, perhaps with some more support, he may whether the storm of fire and get into combat to use his monstrous creature status.

This is the second Spyder, and like the first he is painted Necron Abyss, highlighted with Enchanted Blue. The head is painted Brazen Brass to add interest and the eyes and power sources have been painted with 'Ard Coat to gloss them.
Unlike the first Spyder, this one is basic without a Particle Caster or underbelly tools. A simple Spyder to bolster the survivability of the first.
And here are a few shots of the Spyder on the Games Table. I love the insect look these Necron Constructs have - I still make 'chittering' noises when they enter play, ha.
And finally, a shot with it's older cousin. I have one more to do for the squad of 3 I am allowed, he is still WIP. Thanks for dropping by.

11 Dec 2014

Necron Air Force so far...

Just a quick one to post as promised a shot of the growing Necron Air wing so far. three Night Scythes and a Doom Scythe. Maybe Father Crimbo will be good to me and get a FW Necron Night Shroud Bomber...
I think they look pretty darn awesome ;)

9 Dec 2014

Chaos Warhound Project - finishing the Torso interior


Hi everyone, todays post is about the progress I have made on the interior of the Torso; the last post was about the main painting and build, but there were still a few bits left to add.

Now complete is a bulkhead/door which separates the compartments:
 
A fleshy tube which is erupting from the bulkhead and goes into the (unfortunate) Techpriest:
The ceiling of the compartment, which can also be viewed when the Torso ‘lid’ is attached:
 
I painted all these separately as there was no way you would be able to reach any of the detail if you built it first. The build was straightforward, but unfortunately obscures even more of the detail now…
Not a huge amount of progress in a week – but I am also working on a other bits that aren’t finished, so I don’t want to post them yet – but here’s a sneak peak of how it’s coming along.

8 Dec 2014

Necron Night Scythe #3

Here is another Necron Night Scythe for my ever growing ever-living Necron Army. Again, I have painted it Necron Abysss Blue and Metallics to match the other two, however I have added a few other blue plates, maybe this automaton is a veteran pilot?
The front view always looks awesome. Especially when swooping over the bombed out terrain.
The base shows some wreckage bits I had from a Relictor StormTalon, my other army, I cut it with a razor saw to appear half buried, and painted scorch marks on the wing. Hope you like - I'll post a shot of all three and the Doom Scythe next up. Thanks for dropping in.

2 Dec 2014

Chaos Warhound Project – painting the interiors


Finally onto the parts I get excited about – the painting! As I mentioned in one of my earlier posts, I want to fully paint the interior of the Warhound – if you’ve not seen one before, it is absolutely packed with detail! But that does mean painting before assembling…
 
I focused just on the torso interior for this step – although there is still the interior of head to do. The torso is in four parts, three of which are pretty flat and easily accessible, but the fourth (the front part) is semi-enclosed, so it was slightly tricky getting in all the nooks and crannies.

I’ve painted it up using my standard iron paint scheme and metallics (and fleshy-bits) and had loads of fun finding and bringing all the hidden detail to life. I think all in all it took about 12 hours to get this paint job done.
Actually building the torso was immensely satisfying when I got to see the interior coming together – there is still a door and weird tentacle thing to finish and add, but I am doing them in later steps. It was slightly annoying that you can’t see half the detail when viewing from above – but at least I know its there…
The build went very smoothly; I had dry fitted all the parts previously and the pins were already glued into place. I also pre-drilled some holes through the floor of the interior which I could now finish and pin – these holes will be covered up by a door.
In total there are three pins in each of the side components making up the rear of the torso, then two more to join the front and rear pieces. To support these two pins, there are the two more going through the interior floor and another two going up through the base of the torso, meaning it is pinned through 3 different angles – this thing should be bombproof! There were a number of gaps visible in the torso from the outside, so they have been greenstuffed – next up, the outside of the torso.
Blog Widget by LinkWithin